7 Best Fixes for a Vacuum Bed Not Holding Small Parts?

Time:2026-11-21 Author:Ethan
0%

Small parts can shift, chatter, or lift when a vacuum bed cannot maintain enough grip. The cause is not always a failing pump. A tiny workpiece may cover too little of the bed, while dust, worn seals, or an uneven spoilboard can quietly reduce suction. Porous materials can make the problem worse. Even a sharp cutter may pull a part loose if the cutting sequence leaves too little material supporting it.

Why is the vacuum bed not holding small parts during cutting? This guide looks at practical checks that help answer that question, from measuring vacuum pressure and checking for leaks to cleaning the surface and improving workholding zones. It also covers spoilboard condition, gasket placement, toolpaths, and tabs. Small details matter. A strip of debris under a sheet or an uncovered vacuum zone can change how securely the stock sits.

The seven fixes are intended as a troubleshooting path, not a promise that one adjustment will solve every setup. Start with simple inspections, then test changes on scrap while monitoring the machine and workpiece. A pressure reading can be useful, but it does not tell the whole story if airflow is restricted or the material is porous. And sometimes, the obvious fix is not the real one. Recheck the setup before increasing cutting forces or assuming the pump has failed.
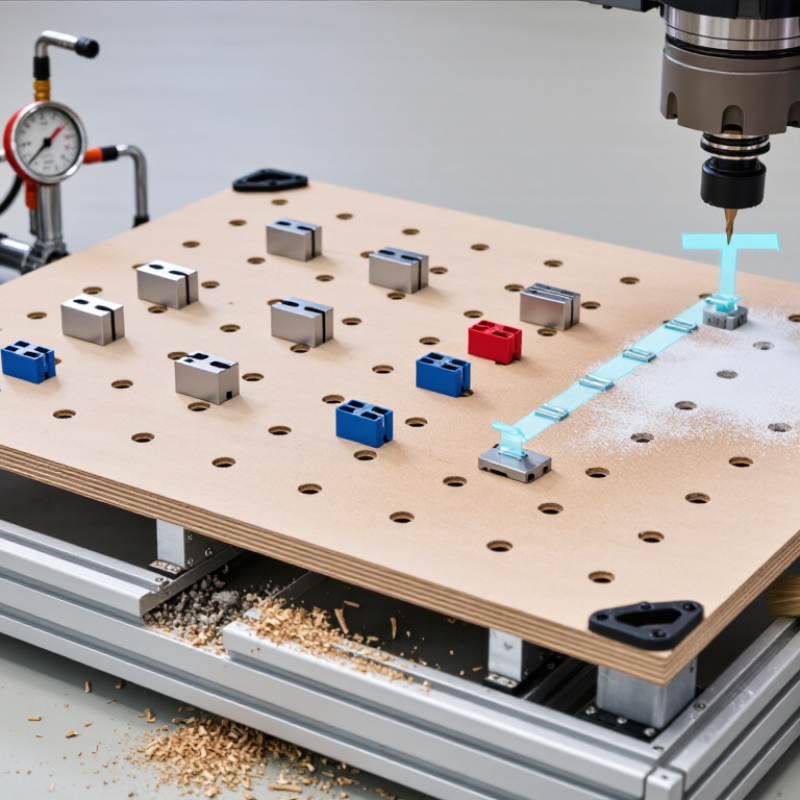
7 Best Fixes for a Vacuum Bed Not Holding Small Parts?

Diagnose Why the Vacuum Bed Cannot Hold Small Parts

When a vacuum bed cannot hold small parts, the cause is often a leak, not a weak pump. A small workpiece may cover too few holes to create a sealed area. Check whether vacuum drops when the part is placed, and compare readings across bed zones if separate gauges are available. A steady reading can still be misleading if the gauge is far from the work surface.

Look for exposed holes around the part, worn gasket cord, and gaps where the spoilboard meets the bed. A strip of paper can reveal airflow: if it flutters near an uncovered opening, that zone is leaking. Check the filter and hose for dust buildup or loose connections, too. I once blamed the pump before noticing a shallow groove under the spoilboard. It was an easy assumption, and a costly delay.

Material matters. Porous wood or rough stock can bleed air through its surface, while a slightly warped part may seal only at its center. Wipe the bed clean, inspect the spoilboard for deep cuts, and test one zone at a time. If vacuum improves when unused holes are covered, the issue is likely lost sealing area. If readings remain low across the bed, inspect the plumbing and pump. Small parts are unforgiving. A tiny gap can be enough.

Why Small Parts May Not Stay on a Vacuum Bed

Ideal holding force depends on both vacuum pressure differential and the part’s effectively sealed area. A small part, poor seal, blocked vacuum path, or leak can leave too little force to hold it securely.

How to use this chart: Check the part’s effective sealed area, then compare it with the machine’s measured pressure differential at the bed. Values show theoretical force (F = pressure differential × area); leakage, surface texture, and acceleration reduce the force available in practice. Inspect seals, ports, and airflow if the measured force is insufficient.

Inspect the Vacuum Pump, Hoses, and Connections

When a vacuum bed loses small parts, start at the pump and follow the airflow path. Switch the machine off before touching hoses or fittings. Check the pump’s filter and inlet for dust, chips, or a clogged element; restricted airflow can reduce holding force. If the pump has a service indicator, compare it with the manual rather than guessing. Small details matter.

Inspect each hose for flattened sections, loose clamps, splits, or brittle spots, especially near bends and moving joints. A faint hiss can reveal a leak, but sound alone is not conclusive. Read the vacuum gauge with the bed covered, then compare it with the reading under normal operating conditions. A sharp pressure drop may point to a leak or a pump that cannot keep up. Not every drop means the pump is failing.

Check connection faces and seals for grit, wear, or uneven seating. Refit loose connections and replace damaged seals with parts specified for the machine. Avoid overtightening; it can distort fittings and create a worse leak. If the pressure still falls, isolate hose sections one at a time, following the equipment instructions. Take notes. It is easy to blame the pump too soon.

Seal Air Leaks and Clear Blocked Vacuum Channels

A vacuum bed may lose its grip because air enters faster than the pump can remove it. Start with the seal around the work area. Look for a curled gasket, flattened foam, or dust trapped beneath the material. Even a narrow gap can weaken suction around a small part. Listen for a steady hiss near hose joints and fittings. A vacuum gauge can help confirm whether pressure changes after you isolate sections. Check the machine’s guidance before using any leak-detection method.

Then inspect the vacuum channels. Fine chips, dried adhesive, and scraps can partly block narrow grooves. Switch off and isolate the system before cleaning. Use a soft brush or vacuum to remove debris; avoid sharp tools that could damage channel surfaces. Check hoses for kinks or cracks, too. Restore one section at a time, then watch the gauge and test with a small, flat scrap. If the reading improves but the part still shifts, the workpiece may cover too few channels. That detail is easy to miss. Not every weak hold comes from a leak, and repeated adjustments can obscure the original cause. Keep notes on which seals and channels you checked.

Improve Part Contact with Gaskets and Better Positioning

Small parts often slip on a vacuum bed because they cover too few openings to create a reliable seal. A gasket can help by forming a tighter boundary around the workpiece. Use a soft, vacuum-compatible gasket, and keep it flat, clean, and free of chips. Even a tiny gap can weaken suction. Check that the gasket does not cover the part’s cutting area or deform thin edges. The right fit may take a few adjustments.

Positioning matters just as much. Place the part over a sealed zone, with its edges supported where possible. If the bed has several vacuum zones, isolate unused areas to reduce leakage. For irregular pieces, a simple locating stop can prevent movement while you set the part down. Avoid pushing the part hard against the stop; that can tilt it and leave a gap underneath. I have found that small alignment errors are easy to miss. They still matter.

Tips: Wipe the bed and gasket before loading parts. Test suction by gently nudging the workpiece before machining. If it shifts, inspect the seal, reposition the part, or add a suitable support. Keep notes on which gasket shape and placement worked. A quick test is useful, but it is not proof of a secure hold.

Adjust Vacuum Settings and Test the Hold Before Machining

7 Best Fixes for a Vacuum Bed Not Holding Small Parts?

Small parts can slip when the vacuum setting is too low, the surface leaks, or the part covers too little of the bed. Adjust the vacuum gradually, rather than immediately turning it to maximum. Watch the gauge as the pump settles, and check whether the reading stays steady. A changing reading can point to leaks around the workpiece, dust on the bed, or an uncovered vacuum zone. Clean the contact area and isolate unused zones if your setup allows it. Then test the hold before machining.

Tips: Place the part in its intended position and press it down gently. Try a light hand check from several directions; do not use the cutting tool to test the hold. If the part moves, stop and inspect the seal. A thin gasket or a sacrificial fixture may help with very small pieces.

Before cutting, run the spindle-off checks your machine procedure permits, and confirm the part remains still. Recheck the gauge after repositioning or changing vacuum settings. Keep within the bed and pump limits specified for your equipment. A stable reading is useful, but it does not prove every edge is secure. If a piece shifts despite a steady gauge, the setup may need a better seal or more support. That’s an easy detail to miss.

FAQS

What should I inspect first when a vacuum bed loses its grip?

Switch off the machine. Check the pump filter, inlet, hoses, and fittings for dust, kinks, cracks, or loose clamps. Small details matter.

How can I spot a leak in a hose or connection?

Look for damaged seals, uneven connections, and flattened hose sections. A faint hiss may help, but sound alone cannot confirm a leak.

How do I check whether the vacuum reading is changing?

Read the gauge with the bed covered, then compare it with normal operating conditions. A sharp drop may suggest a leak or limited pump flow. It does not prove the pump has failed.

What can cause a weak seal around a small part?

Dust beneath the material, a curled gasket, or a narrow gap can weaken suction. Even a tiny opening matters.

How should I clear blocked vacuum channels?

Switch off and isolate the system first. Use a soft brush or vacuum to remove chips and scraps; sharp tools may damage the grooves.

Should I turn the vacuum setting to maximum?

Adjust it gradually and watch the gauge as the pump settles. Also clean the contact area and isolate unused zones, if your setup allows it.

How can I test whether a part is held securely?

Place it in position and press gently. Try a light hand check from several directions, with the spindle off when your procedure permits. Stop if the part moves.

What if the gauge looks steady but the part still shifts?

The part may cover too few channels or need a better seal, thin gasket, or sacrificial fixture. A steady reading does not prove every edge is secure. I might blame the pump too early, so notes can help.

Conclusion

When small parts shift or lift during cutting, the cause is often insufficient vacuum, an air leak, a blocked channel, or poor contact between the part and the bed. This guide explains how to diagnose the problem by checking the vacuum pump, hoses, and connections, then inspecting vacuum channels for debris or obstructions. Sealing leaks and clearing blocked passages can help restore consistent suction.

It also covers practical ways to improve the hold, including using suitable gaskets and positioning each part so it makes better contact with the bed. Finally, adjust the vacuum settings as needed and test the hold before machining begins. Understanding Why is the vacuum bed not holding small parts during cutting makes it easier to find the source of the issue and apply a targeted fix, helping reduce movement and support more reliable cutting.

Ethan

Ethan

Ethan is a seasoned marketing professional with a deep expertise in our company's innovative product line. With a passion for sharing knowledge and insights, he takes the lead in regularly updating our corporate blog, where he explores industry trends, product features, and effective marketing......