A pneumatic cutting tool can sound sharper than expected, especially in a small workshop. The hiss from its exhaust, vibration through the housing, and contact between the blade and workpiece all add to the noise. How to reduce noise from a pneumatic cutting tool is not just a question of buying a quieter model. It starts with identifying where the sound comes from.
Listen from a safe distance while the tool runs under normal conditions. A sudden rattle, uneven pitch, or stronger exhaust hiss may point to a worn component or poor setup. Check the manufacturer’s instructions before changing air pressure or fitting an exhaust muffler. The wrong adjustment can affect cutting performance. Small changes matter.
This guide looks at practical ways to lower noise without compromising control. These include keeping the tool in good condition, choosing compatible mufflers, reducing vibration at the work surface, and managing compressed-air flow. A loose panel on a nearby bench can turn a modest tool into a much louder nuisance. That detail is easy to miss. Hearing protection remains important, but it does not make a noisy setup acceptable or fix its cause. Noise levels vary by tool, material, and workspace, so no single method works everywhere. Some improvements may feel minor at first. Measure and reassess. A careful approach helps operators make sensible changes, protect their hearing, and keep the cutting task predictable.
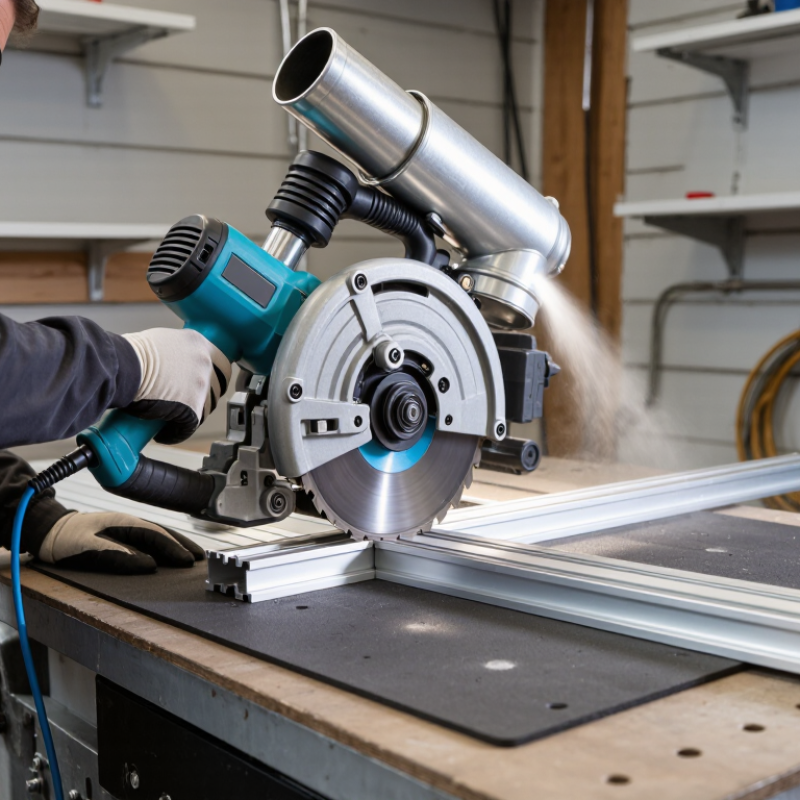
A pneumatic cutting tool does not make noise from one place. The exhaust is often the sharpest source: compressed air leaves the tool at high speed, producing a hiss or shriek near the handle. The motor and internal airflow add a steady whine. Worn bearings, loose guards, or damaged mufflers can make that sound harsher. Small faults matter.
Noise also comes from the cut itself. A disc scraping metal may produce a high-pitched squeal, while a vibrating workpiece can rattle against its support. Thin sheet metal is especially prone to resonance; the sound may change when the operator shifts the clamp. That detail is easy to overlook. A microphone reading alone cannot identify which part is responsible.
NIOSH’s 1998 Criteria for a Recommended Standard: Occupational Noise Exposure sets an 85 dBA, eight-hour recommended exposure limit, using a 3 dB exchange rate. This is an exposure benchmark, not a rating for any particular cutting tool. Measure noise near the operator’s ear during realistic cutting, then compare readings with the tool idling and cutting. Check the exhaust, tool body, disc, and workpiece separately. The loudest source may vary with material and pressure, and one quick test can miss it.
Exhaust air is often a major noise source, while cutting contact, airflow through the tool, and vibration can also contribute. The values shown are indicative sound-pressure levels in dB(A), not universal specifications; actual levels vary with the tool, material, operating pressure, distance, and measurement conditions. Consider a compatible exhaust silencer, maintenance, vibration control, and hearing protection.
Before treating a pneumatic cutting tool as inherently loud, inspect it while disconnected from the air supply. Check the exhaust muffler for blockage, cracks, or missing parts; a damaged or clogged muffler can change the tool’s sound and airflow. Look for loose guards, worn bearings, and vibration at the handle. Small rattles matter. A mechanic’s listening check can help locate a fault, but it cannot measure exposure.
Then inspect the air system. Compare supply pressure at the tool inlet with the manufacturer’s specified range, and check for leaking couplings, kinked hoses, and water or debris in the line. Excess pressure may increase noise and wear; low pressure can make cutting rough and encourage longer tool use. A gauge alone can mislead if airflow drops under load. Measure sound near the operator’s ear with a calibrated meter, during actual cutting. NIOSH’s Criteria for a Recommended Standard: Occupational Noise Exposure sets an 85 dBA, eight-hour recommended exposure limit; OSHA’s 29 CFR 1910.95 sets an 85 dBA action level for hearing-conservation requirements. These are exposure benchmarks, not proof that a noisy tool is safe. Record readings before and after repairs, and note the material, pressure, and cutting task. The comparison may still be imperfect.
How to Reduce Noise from a Pneumatic Cutting Tool?
Maintain Moving Parts and Set the Correct Air Pressure
A pneumatic cutting tool often gets louder when parts vibrate, rub, or wear. Before maintenance, disconnect the air supply and release trapped pressure. Check the blade or cutting head for damage, then inspect guards, fasteners, and fittings. Tighten loose parts with the tool safely isolated. Clean the air inlet and lubricate moving components only as directed by the tool’s instructions. Too much lubricant can attract dust, while too little may increase friction. Small details matter.
Set air pressure at the regulator, using the tool’s specified operating range. Read the gauge while the tool is running, since pressure can drop under load. Excessive pressure may raise the cutting speed and noise without improving the cut. Low pressure can also cause rough operation, encouraging extra contact and vibration. Adjust gradually, then make a short test cut in suitable material. If the sound changes sharply, stop and inspect the setup rather than simply turning the pressure up.
Tips: Keep a simple maintenance log with pressure readings and lubrication dates. Compare the tool’s sound after each adjustment; a phone recording can help, though it is not a precise measurement. Wear suitable hearing protection, and never remove a guard to reduce noise. I have found that a clean, secure setup often helps, but it will not fix a worn bearing or damaged cutting part. Have persistent rattling or unusually harsh noise checked by a qualified technician.
| Noise source or check | Recommended action | How to check | Expected benefit | Safety note |
|---|---|---|---|---|
| Incorrect air pressure | Set the regulator to the pressure specified by the tool manufacturer. Check pressure while the tool is operating, not only when it is idle. | Use a suitable gauge at the tool inlet and compare the reading with the tool's operating specification. | Avoids excess air flow and unnecessary tool speed or exhaust noise caused by over-pressurization. | Do not exceed the tool's rated pressure. The correct value varies by tool model. |
| Worn or dry moving parts | Follow the maintenance instructions for lubrication, cleaning, and replacement of worn components. | With the air supply disconnected, inspect accessible parts for wear, looseness, or unusual movement. | Can reduce rattling and mechanical noise and help the tool run smoothly. | Use only the lubricant and service procedure specified for the tool. |
| Air leaks at fittings or hose connections | Inspect and properly secure or replace damaged hoses, fittings, and seals. | Listen for escaping air and check connections using an approved leak-detection method. | Removes avoidable hissing and helps maintain consistent pressure at the tool. | Isolate and depressurize the air supply before repairing connections. |
| Uncontrolled exhaust noise | If permitted by the manufacturer, fit a compatible pneumatic silencer or muffler and keep it clean. | Check that the silencer is correctly fitted and does not restrict exhaust flow. | May reduce noise from discharged air; the result depends on the tool and silencer design. | Do not block the exhaust or use an unapproved attachment. |
| Loose or poorly supported workpiece | Secure the material with an appropriate clamp or fixture and support it close to the cutting area. | Check for vibration, chatter, or movement during a controlled cut. | Reduces workpiece vibration and related impact or resonant noise. | Keep hands clear of the cutting path and follow the tool's operating instructions. |
| Noise exposure during operation | Measure workplace noise when needed, limit exposure where practicable, and use suitable hearing protection. | Use a calibrated sound-level meter or dosimeter and follow applicable workplace requirements. | Helps identify exposure risks and verify whether noise-control measures are effective. | Noise levels vary with the tool, material, work method, and surroundings; do not rely on estimates alone. |
How to Reduce Noise from a Pneumatic Cutting Tool?
Install Suitable Silencers and Isolate Vibrations
A pneumatic cutter can be loud for two reasons: escaping compressed air and vibration transmitted through its housing, hose, or workbench. Fit a silencer designed for the tool’s exhaust port, not a generic plug that could restrict airflow. Check the manufacturer’s specified flow capacity, then inspect the silencer for clogging and damage. A blocked unit can affect tool performance. Small details matter.
Vibration needs a separate fix. Secure the workpiece, keep the hose from striking metal surfaces, and place suitable vibration-isolating material beneath fixed supports. Do not soften the tool’s grip or compromise control. In practice, a loose bracket can turn a quiet setup into a rattling one. It happens.
Measure noise at the operator’s position before and after changes, under the same cutting conditions. The US National Institute for Occupational Safety and Health’s Criteria for a Recommended Standard: Occupational Noise Exposure recommends an 85 dBA eight-hour exposure limit, using a 3 dB exchange rate. That is a useful benchmark, not proof that one silencer will achieve a particular reduction. Record readings, check the tool’s air pressure, and reassess after maintenance; results can vary with material, blade condition, and distance.
A pneumatic cutting tool can produce sharp, tiring noise, especially in a small workshop with hard walls. Place a movable acoustic barrier between the cutting area and nearby workers. A dense, sound-absorbing panel can reduce noise reaching other parts of the room. Keep it stable and position it close enough to help, but never let it block the operator’s view, tool movement, or ventilation. Check that hoses and cables cannot catch on its feet. Small details matter.
Barriers do not protect the person holding the tool by themselves. Wear well-fitting earplugs or earmuffs while cutting, and check that they remain secure when you move or sweat. If both are used together, follow the manufacturer’s guidance and your workplace’s hearing-protection procedures. Hearing protection should not make communication or warning signals impossible; use suitable visual signals or other controls where needed. A quick fit check helps, though it is easy to forget during a busy shift. Noise levels also vary with the material, blade condition, and work area, so assess the actual task rather than relying on guesswork. If conversation nearby becomes difficult, review the setup and seek a proper noise assessment.
Exhaust air often creates a sharp hiss near the handle. The motor and airflow add a steady whine.
Yes. A disc scraping metal may squeal. Thin sheet metal can vibrate and rattle against its support.
A microphone cannot identify the source alone. Noise may come from the exhaust, tool body, disc, or workpiece.
Disconnect the air supply first. Check the muffler, guards, bearings, handle, and loose parts.
Excess pressure may increase noise and wear. Leaking couplings, kinked hoses, water, and debris also matter.
Use a calibrated meter near the operator’s ear during realistic cutting. Compare idle and cutting readings.
An eight-hour exposure around 85 dBA is a common hearing-conservation benchmark. It does not prove the tool is safe.
Not by itself. Place a stable, sound-absorbing panel between the cutting area and nearby workers.
Wear secure earplugs or earmuffs while cutting. Combined protection may help, but communication and warning signals must remain possible.
Review it when nearby conversation becomes difficult. Record readings before and after repairs, though comparisons may remain imperfect.
How to reduce noise from a pneumatic cutting tool begins with identifying where the sound comes from. Air escaping through leaks, worn or loose components, excessive vibration, and incorrect air pressure can all make a tool louder. Inspect the tool, hoses, fittings, and air supply regularly, and repair faults before they worsen. Keep moving parts clean and properly maintained, and adjust the pressure to the level recommended for safe, effective operation.
If noise remains, fit a suitable silencer and use vibration-isolating supports where appropriate. Positioning noise barriers between the tool and nearby workers can further reduce exposure. During operation, wear suitable hearing protection and keep it in good condition. These practical steps help control noise at its source and reduce its impact, while supporting reliable tool performance and a safer, more comfortable work area.
Deepit Cutter