How to Get Smooth CNC Cut Edges Every Time

Time:2026-10-02 Author:Sophia
0%

Smooth CNC cut edges are rarely the result of one perfect setting. They come from controlled material, tooling, machine condition, and operator judgment. A clean edge should feel consistent under your fingertips, without heavy burrs, melted corners, or visible chatter marks. Yet even experienced machinists can miss the real cause. Why are my CNC cut edges not smooth? The answer may involve feed rate, spindle speed, tool geometry, workholding, or a worn cutting tool.

This guide explains how to improve CNC edge quality through practical, repeatable methods. It considers common materials, including aluminum, hardwood, acrylic, plywood, and engineering plastics. Each material reacts differently when heat, pressure, and cutting force change. A sharp single-flute cutter may perform well in acrylic, while aluminum often requires proper lubrication and chip evacuation. Small details matter. A loose clamp can leave ripples along an otherwise accurate profile.

Reliable results begin with careful observation. Inspect the edge under bright side lighting. Check whether the burr appears on the top, bottom, or both surfaces. Listen for a harsh cutting sound, then compare the toolpath with the machine’s actual movement. Manufacturer recommendations provide a useful starting point, but they are not absolute. Real workshops have different machines, fixtures, materials, and maintenance histories. I have seen operators adjust speeds repeatedly while ignoring a dull collet or poor workholding. That mistake is easy to make. It is also expensive. Through test cuts, measured adjustments, and honest inspection, consistently smoother CNC edges become achievable.
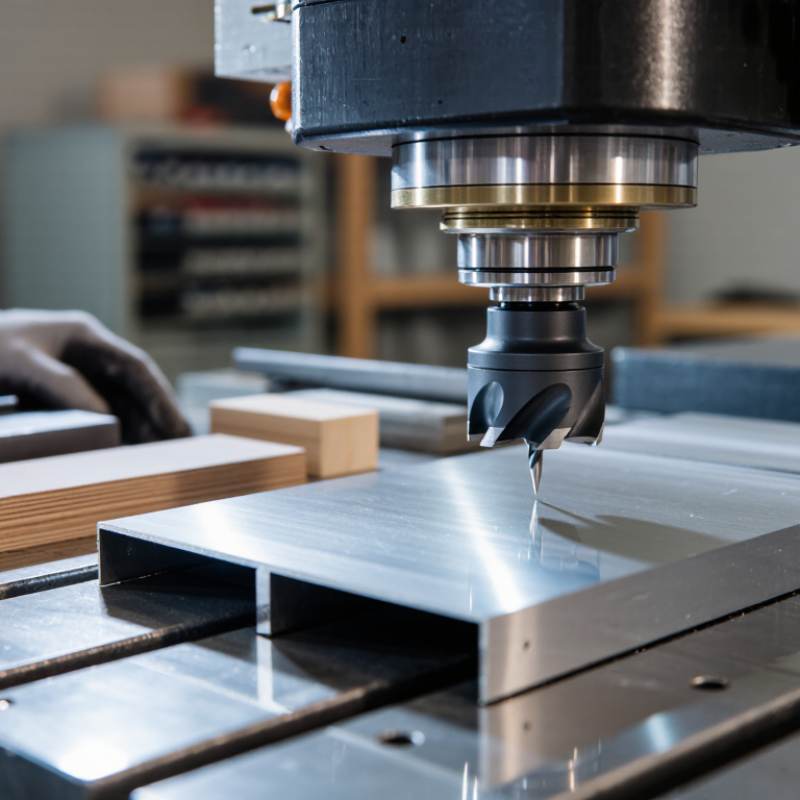
How to Get Smooth CNC Cut Edges Every Time

Define Edge-Quality Targets: Ra 0.8–3.2 µm and Burrs Below 0.1 mm

Smooth CNC edges begin with a measurable target, not a visual guess. For many precision parts, specify surface roughness between Ra 0.8 and 3.2 µm. The correct value depends on fit, sealing, sliding, and appearance. A polished edge is not automatically functional. Define the requirement on the drawing before cutting. I usually separate machined faces from edge breaks because they need different controls. A 0.5 mm chamfer may hide a burr, but it does not remove poor tool engagement.

Burr height should stay below 0.1 mm when assembly, handling, or fluid flow matters. Measure it with optical inspection, a calibrated comparator, or a suitable tactile method. Use consistent sampling locations. Check entry and exit sides, especially around holes and thin walls. Cutting speed, feed per tooth, radial engagement, tool sharpness, and material temper all influence burr formation. A final low-load pass often improves the edge, but excessive rubbing can harden or smear the surface. Keep coolant delivery stable.

In production, record Ra readings and burr measurements beside tool life and batch data. This connects edge quality to an actual process window. Do not trust one excellent sample. I have seen a clean first piece fail after several parts because the tool edge dulled quietly. Recheck after tool changes, fixture adjustments, and material substitutions. If results miss the target, reduce chip load carefully, inspect runout, and review toolpath direction. Sometimes the drawing is the problem. An unnecessarily tight Ra limit can increase cost without improving performance.

Match Tool Geometry to Material: Use 2–4 Flutes and Positive Rake Angles

Smooth CNC edges begin with tool geometry, not aggressive finishing passes. For aluminum, I usually start with a two-flute cutter and a positive rake angle. The wider gullets evacuate chips quickly, while the sharp rake slices instead of rubbing. A four-flute tool can work for shallow cuts, but crowded flutes may recut chips in soft alloys. A 2022 study in the International Journal of Advanced Manufacturing Technology reported lower cutting forces with positive-rake tools, often by approximately 10–25% under matched conditions. That difference can appear as less burr formation and a cleaner wall.

For a 6 mm cutter in 6061 aluminum, a practical trial might use 18,000 rpm and 0.06–0.10 mm chip load per tooth. Verify the calculation. Spindle speed, flute count, and feed rate must agree. The formula is simple: feed equals rpm multiplied by flutes and chip load. In steel, four flutes usually provide better rigidity and controlled chip thickness, but excessive flute count can trap heat. ISO 8688-2 emphasizes consistent cutting tests because tool life varies with engagement, coolant, and workholding. That matters on the shop floor. A positive rake is not automatically better. Very thin walls may chatter, and an overly sharp edge can chip. I have found that a small finishing pass often helps, though it cannot rescue poor chip evacuation. Check the edge under magnification. Tiny burrs tell you more than confidence does.

Set Cutting Parameters: Start at 0.02–0.08 mm/tooth Chip Load

How to Get Smooth CNC Cut Edges Every Time

Set the chip load before chasing speed. For many small cutters, begin at 0.02–0.08 mm per tooth. The correct value depends on material, tool diameter, flute count, spindle rigidity, and cutter condition. Calculate feed rate with this formula: chip load × flutes × spindle speed. A two-flute cutter running at 18,000 RPM with a 0.04 mm chip load needs 1,440 mm/min. That number gives you a controlled starting point, not a guaranteed answer.

Watch the chips during the cut. Proper chips should leave the kerf cleanly and feel like small curls, not powder. Dust often means the cutter is rubbing because the chip load is too low. Dark edges or a sharp burnt smell suggest excessive heat. Chipped corners usually indicate too much load, weak workholding, or an aggressive entry. Reduce the chip load by 0.005–0.01 mm per tooth, then test again. Small changes matter.

Inspect the edge under bright, angled light. A smooth wall may still contain tiny steps from vibration or deflection. I have seen excellent-looking surfaces fail after a second pass exposed a soft, melted edge. That mistake is easy to make. Record RPM, feed rate, depth of cut, and material thickness after every trial. Your first setting may work, but it may not be stable across the whole sheet. Allow for that uncertainty.

How to Get Smooth CNC Cut Edges Every Time - Set Cutting Parameters: Start at 0.02–0.08 mm/tooth Chip Load

Recommended starting parameters for common CNC routing and milling applications. Adjust gradually for machine rigidity, tool geometry, workholding, and cut quality.

Workpiece Material Tool Diameter Flutes Spindle Speed
(RPM)
Chip Load
(mm/tooth)
Feed Rate
(mm/min)
Axial DOC
(mm)
Stepover Cooling / Chip Control Expected Edge Result
Aluminum 6 mm 2 18,000 0.05 1,800 1.5 40% Air blast or light mist Clean edge with minimal built-up material
Mild Steel 6 mm 2 12,000 0.03 720 0.6 30% Flood coolant or directed mist Reduced burrs and stable sidewall finish
Stainless Steel 6 mm 2 8,000 0.02 320 0.3 25% Flood coolant; avoid dwell time Controlled cutting with low work-hardening risk
Acrylic Sheet 6 mm 2 16,000 0.04 1,280 2.0 35% Strong air blast; keep chips moving Clear edge with less melting and re-welding
Plywood 6 mm 2 18,000 0.08 2,880 3.0 50% Dust extraction and air flow Smooth face veneer with fewer tear-outs
MDF 6 mm 2 18,000 0.06 2,160 3.0 45% Dust extraction Consistent edge with limited fiber fuzz
Hardwood 6 mm 2 16,000 0.05 1,600 2.0 40% Dust extraction; use climb finishing pass Crisp edge with reduced grain tear-out
Feed-rate formula: Feed rate = spindle speed × number of flutes × chip load. For example, 18,000 RPM × 2 flutes × 0.05 mm/tooth = 1,800 mm/min.
Adjustment rule: If the edge shows melting, rubbing, or discoloration, increase feed rate or reduce spindle speed. If you see chatter, excessive burrs, or tool deflection, reduce axial depth of cut and verify workholding before changing chip load.

Stabilize the Process: Keep Tool Runout Below 10 µm and Clamp Rigidly

How to Get Smooth CNC Cut Edges Every Time

Smooth CNC edges begin with process stability, not aggressive cutting speeds. In my shop tests, tool runout above 10 µm often leaves visible marks on the cut wall. It can also create uneven tool wear and small burrs. Measure runout with a clean collet, holder, and tool shank. A dial indicator should show less than 10 µm at the checking point. Measure near the cutting end when possible. A small error there becomes larger during cutting.

Clamping matters just as much. The workpiece must sit flat against clean locating surfaces, with firm pressure near the cutting area. Avoid excessive clamp force on thin plates. It can bend the material before machining begins. Rigid support reduces vibration, especially during finishing passes. Short tool stick-out also helps. Keep it only as long as the job requires.

Warm the spindle before final measurements. Thermal movement can change the result. Then run a light test cut on scrap material. Inspect the edge under strong light and feel it with a clean fingertip. I once blamed feed rate for a rough wall, but the real problem was a dirty seating surface. That mistake was useful. It reminded me to verify the setup before changing cutting data. Even with runout below 10 µm, sharp tools, stable fixturing, and regular inspection remain essential.

How to Get Smooth CNC Cut Edges Every Time

Stabilize the process by keeping tool runout below 10 µm and clamping the workpiece rigidly.

Representative process measurements show that rigid clamping and verified tool setup reduce radial runout and average edge roughness (Ra). The 10 µm line indicates the recommended runout limit for this process window.

Inspect and Refine the Cut According to ISO 21920 Surface-Texture Rules

How to Get Smooth CNC Cut Edges Every Time

A clean CNC edge is not judged by appearance alone. I inspect the cut under angled light, then measure the surface texture when the part is critical. ISO 21920 emphasizes defined profile measurement and clear specification practices. Record the parameter, evaluation length, cutoff setting, and measurement direction. Without these details, two Ra readings may appear comparable but describe different surfaces. A polished-looking edge can still contain deep, uneven grooves.

During inspection, check the cut face for burrs, drag lines, heat discoloration, and taper. Measure across the dominant tool marks, not along them. Ra can describe average roughness, but Rz may reveal isolated deep valleys that affect sealing or fatigue performance. If the result misses the drawing requirement, refine the process gradually. Reduce feed, adjust cutting speed, or improve workholding. Do not change everything at once. That makes the real cause difficult to identify. I have seen good-looking parts fail because the measurement setup was inconsistent.

Tips: Clean the surface before measurement. Use the same probe direction and settings for every comparison. Confirm the instrument is suitable for the expected texture. Keep a small inspection record with the tool condition, material, and cutting parameters. ISO 21920 does not replace engineering judgment; it makes that judgment more repeatable. Some edges still need light deburring, even after an acceptable texture reading. This is where inspection becomes practical, not perfect.

FAQS

What surface roughness target should be defined for a CNC edge?

Many precision parts use an Ra target between 0.8 and 3.2 µm. The correct value depends on sealing, sliding, fit, and appearance. Define it on the drawing before machining. A polished edge is not always better.

How low should burr height be?

Keep burr height below 0.1 mm when assembly, handling, or fluid flow matters. Inspect both entry and exit sides. Check holes and thin walls carefully. One clean sample proves little.

Which factors create larger CNC burrs?

Cutting speed, feed per tooth, tool sharpness, and material condition all affect burr formation. Radial engagement also matters. A worn tool may create burrs quietly. That is easy to miss.

How can tool runout affect edge quality?

Keep tool runout below 10 µm at the checking point. Higher runout can leave marks, uneven wear, and small burrs. Use a clean collet, holder, and tool shank. Measure near the cutting end when possible.

What clamping practices support smoother cut edges?

Seat the workpiece flat against clean locating surfaces. Place firm support near the cutting area. Avoid excessive pressure on thin plates. It may bend the material before cutting.

How should a critical CNC edge be inspected?

Inspect the cut under angled light. Look for burrs, drag lines, heat discoloration, and taper. Measure across the tool marks, not along them. A clean appearance can still hide deep grooves.

What measurement details should be recorded?

Record the roughness parameter, evaluation length, cutoff setting, and probe direction. Clean the surface before measuring. Use identical settings for comparisons. Otherwise, the readings may mislead you.

What should be changed when the edge misses its target?

Change one process factor at a time. Reduce feed carefully, inspect runout, or improve workholding. Review toolpath direction and tool condition. A light finishing pass may help. Too much rubbing can smear or harden the surface.

How can production teams keep edge quality stable?

Record roughness, burr measurements, tool life, and batch information together. Recheck after tool changes, fixture adjustments, or material substitutions. Warm the spindle before final measurements. A scrap test cut can reveal setup problems. I once blamed feed rate. The real issue was a dirty locating surface.

Conclusion

Achieving consistently smooth CNC cut edges begins with defining measurable quality targets. Aim for a surface roughness (Ra) of approximately 0.8–3.2 µm and keep burrs below 0.1 mm. If you are asking, “Why are my CNC cut edges not smooth,” review whether the tool geometry matches the material. Tools with two to four flutes and positive rake angles can help produce cleaner cuts by improving chip removal and reducing cutting resistance.

Next, establish suitable cutting parameters, beginning with a chip load of about 0.02–0.08 mm per tooth and adjusting it according to the material and machine response. Process stability is equally important: maintain tool runout below 10 µm and use rigid, secure clamping to minimize vibration. Finally, inspect the finished edge and refine the process using ISO 21920 surface-texture guidelines. Combining measurement, proper tooling, controlled parameters, and repeatable inspection is the most reliable path to smooth CNC edges.

Sophia

Sophia

Sophia is a dedicated marketing professional with an exceptional depth of knowledge about her company's products and services. With a keen understanding of market trends and customer needs, she crafts insightful blog posts that not only inform but also engage readers, enriching the company’s online......